
Light Straw-Clay
 Michael G. Smith has a background in environmental engineering, ecology, and sustainable resource management. In 1993, along with Ianto Evans and Linda Smiley, he started the Cob Cottage Company, a research and teaching group focused on reviving and improving traditional forms of earthen construction. He is the author of The Cobber's Companion: How to Build Your Own Earthen Home (Cob Cottage Co., 1998) and co-author of The Art of Natural Building: Design, Construction, Resources (New Society, 2002) and The Hand-Sculpted House: A Practical and Philosophical Guide to Building a Cob Cottage (Chelsea Green, 2002). He teaches practical workshops and provides consultation to owner-builders on a wide variety of natural building techniques, site selection, and design. He lives in an intentional community in Northern California. His informative website is www.strawclaywood.com.
Questions and Answers
Q: My question is about Light Straw-Clay. I am building a timber structure and I am going to do Light Straw-Clay infill. I attended one of 2 of your workshops and have a question as to how long I should let the clay slip straw sit around before tamping into forms. And should I use green or dried branch supports inside the walls?
A: The slip-coated straw can either be packed immediately into the wall cavity, or else left to set up for up to 24 hours. This supposedly helps the clay soak into the straw so the wall will hold together better, but I have not noticed that it makes a huge difference. In any case you want to keep the coated straw well covered so that it doesn't dry out, or you will need to moisten it again before packing it into the wall.
As far as the horizontal pins go, I have used both green and dry, both with good results. Probably dry is better so you introduce less moisture and movement into the wall as it dries. On the other hand, you want the sticks to be quite flexible, not brittle, or they may break when you tamp straw-clay over them.
Q: We are thinking about building a post and beam straw bale house and we are looking at options for the interior walls. Light straw-clay sounds like it could be a good option. Could it be built on a traditionally framed floor?
A: Yes, certainly. Light straw-clay can be built as a conventionally-framed stud wall with straw-clay infill. It is a bit heavier than a standard wall with fiberglass insulation and sheetrock, but not terribly so.
Drywall is such a pain to work with and we want something that will give a similar look to the exterior walls. Would it work OK for bathroom walls? I am assuming you couldn't have plumbing or electric inside the wall.
Sure you can put plumbing and electricity through a light straw-clay wall. There are some special considerations, but it can be done easily enough. As far as bathrooms go, I would recommend a lime plaster to protect the straw from moisture. I have a wet sauna with lime-plaster over light straw walls and there have been no problems so far with moisture.
Q: I'm working with Builders Without Borders on housing designs for Afghanistan. One possibility is building hemispheric domes out of straw-clay blocks. One or more coats of straw-clay would help tie it together. Lime plaster seems like the best finish. I know you have some experience in this area, so maybe you could answer a few questions. Does this sound like a feasible idea? Do you know the compressive strength of straw-clay? Has anyone done this before? Any ideas? By the way, I really enjoy your website and have spent a number of hours reading your articles. You have what most websites lack - usable information. Keep it up.
A: (Kelly) I certainly believe that you could make a dome out of straw-clay blocks and that it would be inherently well insulated; the question is how long would it last? Straw-clay is vulnerable to moisture penetration, and domes are especially open to all of the weather. Straw-clay is typically used as infill in timber-framed structures with substantial eaves to protect the wall from rain. This means that some way of sealing the dome would be essential. I'm afraid that lime plaster would not do the trick, since it is quite breathable and does absorb moisture readily. The other concern is that even if you managed to seal the exterior completely, then you have the potential problem of condensation forming on the inside and not being able to escape through the wall. All in all, I would look to some other method of building that eliminates these problems. Domes are great because they are so resource efficient...you just need to build them with materials that can handle the weather, naturally, such as lightweight cement, stabilized adobe or cob, earthbags filled with mineral material (is there volcanic rock in Afghanistan?) and covered with a stabilized plaster.
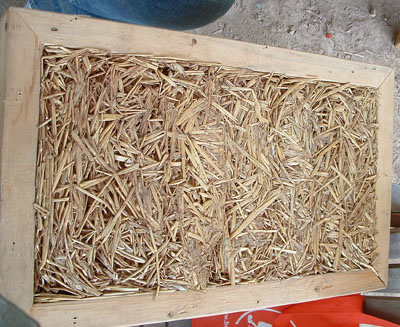
Comment: I was surprised at how little clay was involved in this light clay sample. This sample was very light and felt very strong. Of course straw is the best for light clay because the long fibers interweave, and then the seeds sprout and tie it together even more. Only completely useless where termites prevail.
Q: I want to build a clay/straw house. I wanted to know how tall I can go with it. Can I do a tall 2 story, or 3. Or is that an overload on it.
A: I'm wondering what you mean by a clay/straw house. Are you referring to the German technique known as light straw-clay or slipstraw in the U.S.? If so, it is certainly possible to build a multi-story house using that technique. The straw/clay mixture is used as an insulating infill within a wooden framework. You just need to make sure that your beams etc. are strong enough to support the weight of the walls on the higher stories, since light straw clay is considerably heavier than standard U.S. lightweight construction.
Yeah slip straw is what we are wanting to do. We actually have been looking at using grain bins for the outer shell because we live in farm land and have access to used grain bins for very cheap. Sort of a grain bin castle design :) Well I have been reading about light straw clay for a bit now and really want to do it on the inside of the bin for the look and the insulation value. But from what I read I can't build it against the inside of the steel because it will not dry...?...or maybe its that it will dry to long and rot? I'm not exactly sure, I just know I am reading it needs to be open on both sides. So I am trying to figure out a way to do it with slip straw inside still. Or maybe its that the walls have to be breathable, and if its on the steel wall it wont be. So I don't know if I can figure out a way to dry it, or the heat of the steel itself in the summer after we would erect the inner wall would help dry it? Or really how we could do it. Maybe I'd have to make straw bricks ahead of time, and stack them so they have a gap between them and the steel. I don't really know at this point how to make it work.
In my opinion, it is never a good idea to have a straw-rich material (e.g. straw bale or slipstraw) in direct contact with a non-breathable surface, especially one (like exterior metal) which will get cold and become a condensation surface for moist air moving through the wall. This is a recipe for potentially severe water damage inside the wall over time.
What would make me feel comfortable is if there were an air space between the slipstraw or bale walls and the metal, vented at the bottom and the top (carefully of course to avoid rain penetration) so that moist air could make its way out of the building rather than condensing in contact with the wall. This would be relatively easy to achieve with bales; harder with slipstraw, as you would need to devise some sort of forming system that was rigid enough to hold the air space while the slipstraw was being tamped in place, but also breathable. Perhaps you could do it with hardware cloth. You could attach vertical 2x2s to the interior of the silo, spaced fairly close together (12" ?), stretch and staple 1/4" hardware cloth to the inside of those, use the 2x2s to anchor your interior framing (to which you could attach a bendable form made of thin plywood, for example) and then fill the cavity between with your slipstraw. I think this would probably work, although it would be quite a project.
I don't recommend the straw/clay block idea because I think it would be hard to get enough insulation that way. Even with very light slipstraw (not much clay and not much compression), you are only getting about R-1.5 per inch of thickness... perhaps slightly more. To make a mixture that will hold together in block form you need to add a lot more clay, and your R value probably declines to close to R-1 per inch.
So I could do something like have bales walled up but just spaced off the inside wall of the bin? Am I understanding correct? So there is a gap between wall and straw.
Yes, I think you could stack up the bales, leaving a narrow air vent between the bales and the silo wall, which would be vented to the exterior of the building. Then of course you would plaster over the interior surface of the bales.
Q: I am curious as to using corn stalks as insulation. I was walking through a part of a corn field just picked and I was looking at a stalk and wondering if it could be used in slip straw so I grabbed it to take a closer look and it seems tough like straw but then a core that is like Styrofoam, so I thought hmm that stuff seems like it would be really good. So that's my question: you guys ever try anything with corn stalks?
A: I don't know whether corn stalks would work well in a light-clay application, although I suspect not unless they were chipped up. I think that full-length stalks would be too rigid and elastic to bond together well. If you were to run them through a chipper/shredder and then let them dry, they might work fine, although I don't know how durable they would be. If you try it, let me know how it goes.
Q: I want to know if I could do anything to speed up the drying time, like if I did a thick light straw clay. I thought of running a few pipes through it with holes to blow in hot air or something like that.
A: The best that I know to do is to make sure you have really good ventilation. Electric fans can help.
Q: Can you expect good results by packing a light straw clay mix into the six inch gap left between the two six inch CEB walls of an 18 inch double wall structure? Will lime stabilization added to the clay slip improve the insect and decomposition resistance? Does an expansive bentonite clay have any problems that you know of for a light straw clay mix? I have easy access to an almost pure supply of the stuff. Experiments with both the lime and the bentonite seem successful, and a very light panel is the result.
A: If you pack a damp straw-clay mixture between 2 layers of CEBs, I would be concerned that you could get a lot of decomposition in the light straw clay before it dries. I always use wooden or plywood forms that are removed as soon as they have been filled. If you leave the forms on for even a day or two before stripping them it is common to see mold growing at the edges of the light straw clay just inside the forms. Your CEBs will be more "breathable" than plywood, but I doubt that they would let moisture escape quickly enough to eliminate the possibility of rotting in the infill. One way to address this would be to coat the straw with slip and let it dry completely in the sun before packing it into your wall.
I have not used pure bentonite for building, but I would think that if there is one building technique where its expansiveness would not cause big problems, it would be light straw clay. If you have made some test samples and they look good, I would trust your testing process.
As far as the addition of lime goes, I don't know whether it would increase resistance to either insects or decomposition. My guess is that it might, but I wonder whether any increased resistance would be worth the additional expense, risk, and embodied energy involved. I have also heard (not confirmed) that the causticity of lime can break down cellulose over time.
Q: I read an article about light straw clay and was wondering if this has ever been used as an insulation layer for cob buildings? If so, how is light straw clay layer attached to the exterior of the cob wall?
A: I can't remember ever seeing or hearing about LSC being used to insulate a cob wall. Part of the reason is probably that, compared to more lightweight materials, LSC is only a moderately good insulator per inch of thickness. For example, to get the equivalent of R=12 insulation (which is what you would get from a 3.5" thick batt of fiberglass, cotton, or wool), you would need between 6" and 8" of LSC. If you add that to the exterior of a load bearing cob wall which is already 16" thick, you end up with a 2' thick wall. Not only would you have the problem of attaching the LSC securely to the cob, as you mention, but also you would need to build a form for the outside of the LSC which would mirror the shape of the cob wall. One of the things people most appreciate about cob is its sculptural nature - it is so easy to make curves, arches, etc. But how to match that with a formwork rigid enough to withstand the force of LSC being packed inside? It would be much easier to make the walls straight. So then you end up with a straight wall 2' thick. For much less work you could have built a straw bale wall, and ended up with much better insulation. I'm sure there is a way to solve the technical problems of how to insulate a cob wall with LSC; I'm just not sure that it would be worth the effort. If your goal is a sculptural wall with good insulation, I would lean towards a straw bale wall with really thick earthen plaster.
Q: I am interested in building with straw-clay slip walls but have a 2 story portion. What are the drawbacks, if any, to height?
A: The only drawbacks of building straw-clay 2 stories high are the same as building anything 2 stories high. You'll have to come up with a good system for lifting so much material high into the air. Scaffolding is indispensable. Also, because straw-clay walls are considerably heavier than conventional framed-and-insulated walls, you can run into some minor engineering complications. If all of your second story walls are directly above first-story walls, that will lessen the need for gigantic beams and so on. Good luck!
Q: I have a house in Southeast Oklahoma which is traditionally built with siding. I want to have a finished look of earthen plaster. Could a person use a light straw clay to cover siding or even pull siding and use the technique of LSC then plaster over it? I need some way to change the aesthetics of this house to meet eventual houses I plan to build that will surround it. I plan to use cob, earthbag and strawbale.
A: If you want the look of earthen plaster on a conventional building, there are (at least) two ways you could approach it. One would be to remove the siding and the interior sheetrock, fill the spaces between studs with light straw-clay, and then plaster over both the interior and exterior surfaces. Keep in mind that straw-clay is not as good an insulator per inch of thickness as conventional insulation materials. Depending on your mixture and your technique, you can expect to get about R=1.5 per inch of thickness. So to get the insulation you need in Oklahoma (I'm not sure how cold your winters get) you may need to build out the thickness of your wall framing to get a thicker straw-clay wall.
If you decide to leave your existing insulation and siding in place, then you can probably apply an earthen plaster over the siding. You will most likely need some sort of lath to get the plaster to adhere well. I don't recommend using metal lath or chicken wire, because the expansion and contraction of the metal will tend to crack the plaster. Some effective options could include: plastic deer fencing stapled to the siding; natural fiber burlap glued to the siding with a mixture of clay and flour paste; reed mat screwed to the siding; or lots and lots of nails pounded partway in. The best lathing technique will depend on the condition of your siding and how thick you want to build out the plaster; it may even vary in different parts of the house. Over that, you can apply a base coat made of clay soil, water, and lots of chopped straw. And over that, if you want, you can apply an earthen finish plaster.
Don't forget that earthen plaster is one of the least durable exterior finishes available. If you get much wind-driven rain onto the walls, or if water from the roof drips down the walls, it will quickly damage the plaster. Because your house has not been designed with earthen plasters in mind, there is a good chance that the roof overhangs are too short. You may need to extend them or do something else to keep the weather off your walls. You will certainly want good gutters if you don't have them already.
Q: Could you tell me if there is a concern with termites in slip straw applications?
A: I don't have much direct experience with termites, but I imagine that if you have a bad enough infestation, they could eat anything made of cellulose, which includes straw. Slipstraw is almost always used as an infill within a wooden frame, and I believe that the wood itself would be more attractive to termites than the clay-impregnated straw. By the time termites get into the slipstraw, my guess is that you'd already have a problem with your wooden structure.
Q: We are building an off grid 2 story home on piers, post and beam style. I think I would like to use slipstraw for insulation between the beams. Will I be able to use cedar boards on the outside walls or would I have to use some sort of earthen plaster?
A: Typically, slipstraw (also called light straw-clay) walls are made by filling the cavity in a framed wall between removable forms. The forms should be removed immediately to allow the straw-clay to dry from both sides. I have seen that, depending on the weather, mold can start to grow at the junction between straw-clay and wood within a couple of days if the forms are not removed. After the straw-clay infill is completely dry (several weeks to months), it is usually plastered, but could also be protected on one or both sides with wooden siding. The detail I have seen for this is to fur out the framing with strips of one-by lumber, then attach the siding horizontally to the furring strips. This allows for air flow between the straw-clay and the siding, so that any moisture in the wall can still evaporate out rather than condensing between the straw-clay and the wood where it could lead to mold growth. Also you should detail your siding in such a way as to prevent water running down the outside of the wall from getting between the boards, just as you would with any siding project. Also keep in mind when framing your building that slipstraw is many times heavier than conventional insulation such as fiberglass. You will need to take the extra weight into consideration when engineering your floor girders, beams, etc.
Q: We have a 1900's (dilapidated) house in the North of The Netherlands. When first moving in a year ago, we stripped the gypsum boards, which were soaked and very moldy. Despite the bone chilling cold last winter (it never got warmer than 13 °C inside) we love the "breathability" of the house. However, we need to insulate before this coming winter, and we're very interested in the "clay straw" techniques. Question: our roof is sloped and constructed (outside-inside) of clay roof tiles on a wooden frame, with wooden boards underneath. Would it be possible to use the clay straw as an insulation medium there? And would a layer of 4 inches "do" anything? Also, we're trying to figure out a way to go about it. Personally I've been thinking about constructing wooden frames with chicken wire and filling those with the material, leave them to pre-dry in the barn for a day or two, and then attaching them to the inside roof. Would that be feasible?
A: Much as I love straw-clay, I can't claim that it's a really good insulation for a cold climate like yours. 4 inches of light straw-clay might give you about the equivalent of R-6 or so. For roof insulation in a cold winter climate I would recommend closer to R-30, with R-20 being a minimum. If I were you I would be looking into wool or cotton as roof insulation, and also (if you only have a space 4" thick) planning to increase the thickness of the insulation cavity by adding additional framing.
That being said, even 4" of straw-clay would be a lot better than no insulation at all. And if you can make the house tight, so that you are not losing all of your hot air to the outside through cracks and windows etc., you will be able to keep it warm if you're willing to burn enough wood or electricity or whatever it is you're using as a heat source. However, heating a poorly-insulated space is just not ecologically sound in this age of climate change.
If you do decide to use straw-clay, you should know that it takes a while to dry out. In Germany, the straw-clay experts recommend allowing a week for every inch of thickness for a straw-clay wall to dry, and that assumes that moisture can escape from both sides of the wall. So pre-drying for a couple of days as you suggested would not be enough to make much difference. I always recommend doing straw-clay projects at the driest and warmest time of the year, and making sure you have lots of air flow (open windows with fans) if you are doing it inside a structure. Also, adding boric acid to the clay slip as a mold-retardant is a good idea when working inside, or in less-than ideal drying conditions.
Q: I was wondering about the structural integrity of light straw clay panels. My thought was to pack slip straw into frames and then when dry take them out and attach them to the exterior of a cob wall, plastering over that. With 3x or more the insulative value of cob, a few inches of that ought to help in winter. But would they hold together like that on their own rather than as infill? Would I need to wrap it in wire mesh like I've seen on strawbale homes?
A: There's a huge range of possible densities with straw/clay mixes. The more clay you use in the mix, and the more you compact it, the denser and stronger the straw-clay will become. Of course, the denser it is, the less it insulates. If you make panels using a very light mixture, such as is typically used for infill insulation, there is no way you will be able to move them without them coming apart. In order to make a mixture capable of being transported, you will have to make it so dense that its insulation value will be much less, probably less than R=1 per inch of thickness (that's a guess.) You'd be much better off devising a way to pack your straw-clay mix around the cob wall in situ; you could probably keep it much lighter that way. But keep in mind that a few inches of light straw-clay, even at the maximum possible R-value, is still not very good insulation for a cold climate.
Q: Would an exterior wall with 15" of LCS have about the same insulation of fiberglass insulation? Is a 15" bale of straw adequate insulation for Oregon winters? I'm reading between your lines, so correct me if I'm wrong, but it looks to me like by the time you get enough LCS (light clay slip) to really start to equal a bale of straw you run into drying issues and possible holding it in place because your now outside your studs.... is this correct? I'm 52 and looking for a way I can physically manage to remodel my home. Straw bales seem a bit overwhelming.
A: Depending on how much clay you add and how much you compress it, you could expect an R-value of around 1.5 to 2 per inch of thickness for a light straw clay wall. That compares to almost R-4 per inch of thickness for fiberglass. So you will need twice the thickness of straw-clay as you would fiberglass to reach the same nominal R-value. In fact, however, the straw-clay wall will perform better than would be predicted from this equation, both because of the added thermal mass effect and because the straw-clay fills the cavity more completely than fiberglass batting.
Light straw clay needs to be able to dry quickly or it can mold and even rot inside. The German experts don't recommend that straw-clay walls be thicker than 12" thick. Also they must be able to dry on both sides. This can be challenging in a remodel situation, because you would have to strip your walls all the way down to the framing. Another thing to keep in mind is that the timing is critical with light straw clay. You want a couple of months of dry weather after you pack your walls, so depending on where you are in Oregon (both summer and winter weather vary a lot from west to east) you would probably want to do your straw-clay work at the beginning of the summer.
Straw bale walls have fewer constraints regarding drying because the straw is dry to start out with. Yes, bales are heavy and can be hard to handle by yourself. But if you have a few helpers for a day or two, you can get an awful lot of bales stacked up once all the preparation is done.
Q: I guess the key is in making a good clay slip? Which would involve using the correct proportion of clay etc, as in cob building?
A: Actually the clay slip is the easy part. You want a slip about the consistency of heavy cream or paint; just thick enough that when you dip your hands in and pull them out, you can't see your fingerprints. You can achieve this with almost any clay soil, as the parts of the soil that are not clay (sand, silt, stones) will drop to the bottom of the barrel.
The more challenging parts of the process are getting the slip to straw ratios right and the right amount of tamping. Novices tend to add way too much clay slip and tamp too hard. This compresses the straw and reduces the insulation value of the wall while at the same time increasing the amount of work, materials, and money involved. Unfortunately the "right amount" of slip and of tamping are very difficult to describe in words. My recommendation would be to start with what feels right and then reduce both the slip and the tamping bit by bit until the wall doesn't hold together anymore, then increase it a bit.
Q: I think maybe the "light straw" method might fit the needs of what I have in mind. I have this older model mobile home at my base camp. It was one of those deals where I got it for the price of having it moved from where it had been setting and onto my property. I had it set up and level, then later gutted the whole thing. The wall studs are 2"x4"s and it is pretty structurally sound. It dawned on me one day that, maybe, I (with help,of course) could start, one room at a time, packing between the stud, some variation of the cob building method. I thought about pulling out the existing wiring running throughout the studs, then later, after the walls are done, running the wiring on the outer side of the cob filled walls through proper encasement-- in a like manner to the way I've read it is often done in the construction of strawbale homes. I like the entire idea, or scenario, of using cob (light straw) for several reasons. First, mobile homes make me nervous; and I think that any method of taking a mobile home to a safer level is a smart thing to do. Logically, it seems to me that it would reduce the chances dramatically of fire spreading from one end of the mobile home to the other and engulfing the whole structure in a matter of five minutes as has sadly happened in too many cases. That's number one. Secondly, the idea seems to me that it would provide good/sound insulation value and would create a cozy atmosphere within. And thirdly, I like the idea of the electrical wiring being run on the outer side of the inside walls rather than being trapped inside the airy walls of a mobile home.
A: The idea of retrofitting your mobile home with a straw-clay mix sounds feasible to me. Straw-clay (also called "light clay" or "slipstraw") is an excellent technique for retrofitting old structures since the mixture can be packed into the cavities between the existing framing. The biggest problem you are likely to encounter is with drying. In new straw-clay construction, the forms are stripped immediately and both sides of the wall are left open to drying by evaporation for at least several weeks. In your situation, presumably you will be packing the straw-clay right against the exterior plywood or siding, leaving only the interior surface available for drying. If the drying happens too slowly, you can end up with decomposition of the straw.
To avoid that problem, I have several recommendations. First, do your straw-clay building in warm dry weather. Use a very light mixture with very little clay slip relative to straw. (Beginners are often incredulous at how light you can make the mixture and still have it retain its shape. Open all windows and doors and use fans to maximize air flow inside the mobile home. And mix borax with your clay slip as a mold retardant.
As for the electrical wiring, I don't quite understand your concern. Leaving your wiring exposed on the interior of the wall is not a good idea. It is much more likely to get nicked and create a short if it is not covered. The easiest and safest way to deal with the wiring, it seems to me, is to place it into conduit inside the wall cavity before packing with straw-clay.
Q: I am thinking that I will put wood siding (board and batten) on the outside of the slip straw wall with a one inch gap so the wood is not sitting directly on the straw. Inside I will plaster with lime. Does this sound like a good idea?
A: That sounds like a good solution. Make sure that the gap between the straw-clay and the siding is well vented so that moisture can't build up in there. You will need to very carefully detail the tops and bottoms of that vent space to keep mice and insects out.
Q: How was the 12" maximum thickness for light straw clay walls derived? I see this number mentioned in LSC literature and code documents with no explanation. Was this number derived experimentally as the maximum thickness that will dry before the core decomposes, and under what conditions? Using the 1.6 R/inch value, I need to build a 13.5" thick LCS wall to meet local energy code requirements. I see 12" described as the maximum thickness so often that I feel the need to research this before building.
A: The 12" recommendation for maximum thickness of a light straw clay wall comes from Germany, where most of the work on developing standards for straw-clay has been done. My assumption is that at some point thicker walls were tried and found to rot in the middle before they could dry, whereas 12" walls were found to dry without problems. I don't know whether or not trials were carried out in a laboratory. Even if they were, the 12" recommendation would only be valid for a particular set of conditions including temperature, humidity, and air movement as well as the ratios of clay and water to straw in your mixture and the amount of tamping. As is so often the case with natural materials, it is difficult to come up with a simple and clear set of guidelines that make sense under varying conditions. So the 12" recommendation has been adopted and is generally followed because it usually works.
I have no doubt that under some conditions, a thicker wall would be fine. If you have high temperatures and low humidity for a long time (at least a couple of months after you fill the wall), good airflow, a clean clay source with no organic material, and if you make a light mix with a low clay ratio and don't tamp too much, I'm sure you could get away with 13.5". On the other hand, lacking any of these conditions you can easily end up with mold or rot problems even in a much thinner wall. Another general recommendation is that you should have a week of dry weather after filling the wall for every inch of thickness of your cavity.
Another thing to keep in mind is that R-value is effected by almost as many factors as drying time. 1.6 per inch of thickness is, again, a conservative middling estimate. I believe that by using a very light mix and not tamping much you can increase that probably to 2.0 per inch. You would have to see it to believe the tiny ratio of clay to straw that I have successfully used. Light, low clay mixes have their disadvantages (less resistance to fire and to rot, for example) but they definitely pack better insulation into the same wall thickness.
So I would say you have several options. 1) Use the conventionally accepted practices and values and, with good planning and detailing, you can expect good results. 2) Do your own testing of drying rates, insulation value etc. for your climate, ingredients and ratios and use the results to determine your wall thickness. Or 3) Fudge things a little so you can meet your local energy code, and hope for the best!
Q: I have a partially completed dwelling in southern Ontario, Canada. It's sheathed with 1" pine boards, and wrapped in typar. I eventually plan to finish the exterior with ventilated clapboard siding over 1" furring strips. I'm interested in insulating the 2x6 stud cavities with straw clay. Will the 5.5" of straw clay have a problem drying due to the sheathing and typar?
A: Recommended practice with straw clay is to leave both sides of the wall open for drying. If one side remains covered, mold will often grow inside the wall, up against the covered surface (in this case, your pine siding). If the weather is very dry and you have excellent ventilation, and if the clay and straw you use are both very clean with little extraneous organic matter, you might be OK. You could try a small sample in your building, wait a couple of weeks, and then pull it out to see whether any mold is growing. If not, you could proceed with the rest of the building.
Q: I live in British Columbia, and we built a small oval structure (100 oval feet), stone foundation, stone wall, wooden frame, living roof with extensive overhang (45") Started the walls of slip-straw (7" thick-with borax) fairly late in summer (mid Aug)--(instructor only available then). Outside wall dry enough to put first thick coast of natural plaster on the outside walls. The inside of the building is being heated to 65-70 degrees F, with fans going 24/7. It has now started to rain, and I understand it can dry from the inside, however. From your experience, is the temperature inside high enough for this to happen? Is it possible to dry under these conditions, and is there anything else I can do to facilitate the drying process? Is the outside plaster permeable for letting inside moisture out? Can the walls dry with one coat of plaster on the outer wall? How long do you think it will take to completely dry?
A: Unfortunately, it's hard to give you a precise answer. There are a number of variables that effect drying time. The most important ones are air humidity, air movement, interior and exterior temperature, the thickness of the wall, the density of the straw-clay infill, and the amount of moisture that was in there in the first place. A coat of plaster on the outside will slow down the drying rate as well. I imagine that at this time of year your drying rate is very slow. You can improve it with heaters and fans, as you are doing. I don't think there's much else you can do. Make very sure that none of the rain gets into the walls, but don't wrap the outside of the walls with anything impermeable like a tarp. On the bright side, I've seen straw-clay walls stay damp all through their first winter and dry without problems the following spring or summer. On the other hand, you could also end up with mold problems that will not go away. If you see mold start to form, spray it lightly with a borax and water solution and turn up your fans and heaters. In the spring, you can make an assessment about whether all the mold is dead and you can safely proceed with plaster or whether you will have to replace some or all of the straw-clay. You can tell when it is completely dry either by using a moisture meter or by removing a sample from the center of the wall and feeling it for moisture content.
Q: I have been busy building a post and beam light earth/ cob hybrid, avoiding moisture barriers, products containing formaldehydes and other nasties etc... Everything very successful so far and no moisture problems. Now it is time for an earthen floor. The house site is very well draining to all sites. The base is grown clay, french drain around the foundation and min 20cm drainage gravel as first floor layer. I am keen to insulate the floor with 15cm light earth mixture before putting on the general cob layers. Has any of the expert natural builders used straw-clay-slip (clay slip, light earth, or plain loose straw) as insulation under the cob floor directly on the drainage? I am keen to hear if this is a sensible approach or should be avoided for x reason.
A: I have indeed heard of using straw-clay as insulation under an earthen floor. That idea was described in a little booklet on earthen floors that the Steens wrote almost 20 years ago. I don't know whether anyone still thinks it's a good idea. I have several concerns:
1) moisture. Floors are areas that tend to collect moisture, whether the moisture is coming from above (leaky plumbing, spills, or simply condensation) or from below (transferred moisture or condensation from underground.) Straw-clay is not particularly moisture-resistant. If it gets wet, it will first compress, likely causing the earthen floor above to crack, and then rot.
2) compression. Even if it were to stay dry, straw-clay is a fairly light, compressible material. Any settling or movement in that layer will likely result in cracks in the floor above.
3) insulation. Straw-clay is not excellent insulation. The very lightest mixes might be about R-2 per inch of thickness, but you would need a substantially heavier mix to support the weight of a floor. Assuming optimistically that you might get R-1.5 per inch of a mix stable enough to support a floor, you will need a lot of inches of straw-clay to get you significant insulation.
The problem of insulating under an earthen floor is a difficult one to solve with natural materials. For that purpose I tend to use light-weight lava rock, substituting this for drainage rock in order to get a very thick layer (20-30 cm) of somewhat insulating material.
Q: re: straw clay slip infill. Treated lumber costs little more that untreated. Before treated was readily available, I successfully painted before assembly. Your thoughts? re: 2 x 4 double wall. Larson type truss? 24 in. on center staggered? or aligned? best diagonal support? I plan to build 14 ft. x 36 ft.
A: Treated lumber is extremely toxic, both in its usage and manufacture. Did you know that the sawdust is officially classified as toxic waste that is not supposed to go to the landfill? I avoid it when at all possible. Except for the sill plate (where I prefer to use cedar or redwood), there's no more reason to use treated lumber for straw-clay than any other kind of wall. The clay, being hydrophilic, will tend to draw moisture away from the wood framing and thus preserve it. And you should be designing your roof so that it keeps rain off the wall anyway, or you can get mold problems in the straw-clay.
I like Larson trusses and other systems of double framing with 2x4s. The inner and outer studs can be either aligned or staggered. They need to be aligned around windows and doors anyway. For bracing, you can either let in 2x4s on a diagonal to the outside face of the studs, or else use galvanized strapping. Strapping can be added after the wall is infilled and doesn't get in the way of the packing at all, but is a bit more expensive.
Q: I am currently building a small home and I am insulating with slip straw. I was wondering if there was any concern with plastering with a clay/ horse manure plaster in regards to the breakdown of the straw if I decide to let the plaster ferment before applying. Should a litema plaster only be applied to cob? Should I not let the plaster ferment for a week or two?
A: There should be no concern with the straw breaking down if you apply a Litema plaster over straw-clay. The straw-clay wall should be thoroughly dry before plastering, or course, and you should do your plastering during good drying conditions, so the wall doesn't stay wet for long. One thing to consider is that, compared to cob, straw-clay is a much softer, more spongy material. I recommend at least 3/4 inch of plaster, preferably a full inch, in 2 coats, to turn it into a hard, durable wall and to protect the straw from moisture intrusion (much like a straw bale wall.) I have never seen Litema applied that thickly, and I don't know how well it would work (primarily because I would expect a lot of cracking on a thick plaster application without either sand or long fiber). But you could certainly use Litema as a finish coat over a more standard earthen base coat.
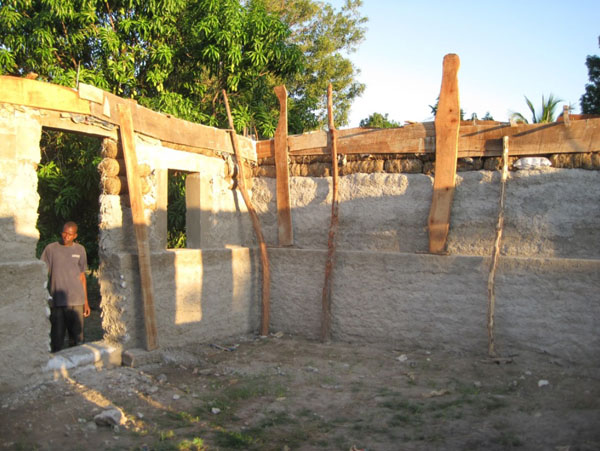
Comment: (Patti Stouter) Here is a photo of what's been going on in Haiti with straw wattle. My Haitian friends with HCDP have built 3 dorms of straw wattle on earthbag base. The HCDP builders really like the straw wattle, although in Haiti you have to get straw right at harvest time. This is firmed up with a poured clay slip, and covered with earthen plaster containing a lot of clay. The final weather-resistant surface should be a lime plaster.
Q: We have a 3 story 2x6 frame with post and beam in British Columbia. Each floor is 100 square feet so the structure is a bit of a tower in shape. we have cedar shingles on plywood on the outside. Before we started to insulate we were under the impression we could use light straw, but it would have to dry before finishing the walls on the inside. So now all the walls are insulated with the light straw and it has been sitting for several months like this... We've had infrared heaters and fans going to dry it up. It seems dry but its hard to tell because we can't see the other side of it because of the plywood and shingles. We want to find a way to finish the interior so we don't have to take off the exterior. Should we create a vapor barrier on the inside to stop condensation from building on the plywood if there is any? I heard that clay will kill any mold when its dry so I'm not to worried about that part; its the condensation and buildup of moisture from living in it that I need to consider. How to work with heat transfer and air movement to avoid mold and moisture to build on the plywood? Would taking a more sealed approach to finishing be better like a vapor barrier (or not) then door skins, finished ply, drywall, wood, etc... or a more breathable approach work better like earth plaster in our situation? also if you have any other recommendations or thoughts to how we could go about doing this.
A: To ensure rapid drying with straw-clay walls, it is generally recommended that they be able to dry to both the inside and the outside. When exterior siding is used as formwork and left in place, you often get mold growth up against the form. It's true that this mold should die or at least go dormant when the wall is dry, but there is a danger that condensation or water intrusion from the exterior can re-activate it later. The preferred method for siding over straw-clay of other earth and straw wall systems is called "rainscreen siding" and involved leaving an air gap between the wall material and the siding to prevent condensation. The only way to do this is to install the siding after the straw-clay is dry; not before.
Given that your situation is not ideal, it's a bit hard to know what to recommend. Is the building to be used as a home, with cooking and bathing inside? If so, I would be concerned for the long-term viability of the building solution, especially if you are in a damp climate like coastal BC. The best approach would probably be to have tons of ventilation to try to get the moisture out of the building so that not so much condenses inside the walls, and to keep the interior as warm and dry as possible so that moisture in the walls can evaporate to the interior. Maybe a mechanical ventilation system/heat exchanger would be in order. I do not recommend sealing both sides of the wall, since over the long term it is virtually impossible to keep all moisture out of a wall system. But I might use a slightly less breathable interior finish than the clay plasters I generally recommend: such as drywall or gypsum or lime plasters.
Before you do any interior finishing, check to make sure that the straw-clay is completely dry. You can use a moisture meter for that or if you don't have one (and can't borrow one) then remove some columns of sraw-clay all the way to the exterior siding and check for dampness and mold.
Q: When making clay/straw slip, is there some way to make blocks first and completely dry them before putting them in the frames as infill? Can they be re-baled and used as regular bales? How about pressed in some kind of mold, and even have slim bamboo rods placed in the middle to give them more structural strength (like rebar)?
A: Yes, what you're describing is certainly possible. Straw-clay blocks can be stacked up with mud mortar like adobes. The only reason I can think of to reinforce them with bamboo rods would be if you want to use them in a tensile application, such as for ceilings or second story floors. In my experience it is hard to make straw-clay blocks that are anywhere near as light and insulating as you can fill a wall cavity. To make a block that you can move around and still have it hold together requires more clay and/or more compression. However, I know that in Argentina Jorge Belanko makes extremely light insulative straw-clay blocks. I've seen them in the film "Mud, Hands, a House" which I strongly recommend. He has specially developed forms for the blocks and he must use very pure, sticky clay. It's definitely worth pursuing to come up with a really good system.
Q: I am building a hybrid earthen 1.5 story house in Northern California and on the west facing wall, which will endure the most wind driven rain, I have used light straw slip to insulate between studs and around windows. My idea is to use redwood boards to make ship lap siding to put on the exterior and I'm wondering if I should put tar paper between the straw slip and the siding? And if so, should I put little strips over the tar paper to create a channel for water to run? Or I read that a layer of clay slip ( mixed with borax?) over the straw slip and the siding right over? It's coming into the rainy season, so I'm trying to figure out how to button up the house!
A: What you're proposing to do is called "rainscreen siding." It's an excellent way to protect a straw-clay wall from the weather and has been used extensively in Europe and the Northeastern US where people have wanted a more durable finish than earthen plaster but without compromising vapor permeability. There are at least 2 essential considerations in the installation. First, you still want to plaster the exterior of your straw-clay wall with at least a half-inch coat of clay-straw base coat plaster before the siding goes on. This serves as an air barrier to prevent air from leaking through the wall and compromising the insulation value of your wall, and it also protects the straw against moisture that may get through the siding, or more likely condense as vapor works its way through the wall. In order to dry out this moisture before it causes harm to the wall or siding, you also need a ventilated air cavity between the plaster and the siding. The easiest way to achieve this is to run vertical furring strips attached to your studs. You can either apply the furring strips first and plaster between them or else plaster over the studs and attach the furring strips with long screws once the plaster is dry or nearly dry. The latter approach allows you to get a more effective air barrier from your plaster, since otherwise you tend to get shrinkage cracks up against all the furring strips. Then you want a way for air (but not mice or insects) to enter the bottom of each stud bay and leave at the top, so you will need some well-screened air inlets and outlets.
The best description of this system I've seen is in "The Natural Building Companion" by Jacob Deva Racusin and Ace McArleton. It's an expensive book, but full of great information about how to make long-lasting natural buildings that perform well in all climates. There are several pages dedicated to rainscreen siding.
Q: I am rebuilding a burned-out stone milk barn to use as a studio, and possibly as an abode at some point. The walls are just one foot thick. I live in Oklahoma, where we have extended periods of extreme heat, and pretty cold winters. Plus it's quite humid. I had thought to insulate at least the north wall with straw light clay. Do I need to have a space between the straw and the stone for moisture issues? I will be putting earthen plaster over the straw. Will I need to beef up the foundation if I have 8 inches or so of the straw?
A: In humid conditions, it's ideal for straw-clay to be able to dry to both sides. This prevents decomposition during the initial drying process and also reduces the likelihood of condensation-induced moisture problems later. How to achieve that in your situation, I'm not exactly sure. You would want to vent the air space between the straw-clay and the stone so that air can carry away excess moisture. Another possibility might be to use some sort of water-resistant insulation, such as rigid foam, between the straw-clay and the stone. This would reduce the likelihood of condensation in the straw-clay, but it wouldn't help with the initial drying. I mention that possibility because 8 inches of straw-clay is not really excellent insulation for your climate - I would only expect around R-12 or so. The bottom of the straw-clay infill also needs to be kept away from ground moisture, so you will either need to create a non-wicking foundation for it, or possibly you could set it on top of the floor, depending on what your floor is going to be.
Q: I am building an interior wall out of light straw clay in a cob home I built. I know it is possible to infill between dimensional 2x4's but prefer not to purchase lumber. I would like to use round timbers that I thinned out of the surrounding forest. The timbers vary in width from 4 inches in diameter to 6 inches. I haven't read of anyone using round timbers as small as 4 inches in diameter for straw clay infill. Is this possible?
A: I've built straw-clay walls as narrow as 2" thick. The narrower the wall is, the more careful you need to be with tamping to avoid ending up with significant voids in the straw-clay. A 4" thick wall should be no problem as long as you are careful when placing and tamping the material.
Q: I want to build light straw slip form wall. How long would they stand with moist or rainy conditions? If it takes me a few weeks to seal the outside... how much dry time does it require when in wet conditions?
A: I would recommend against building straw-clay walls during rainy weather. When the air humidity is high, evaporative drying slows down and can stop completely. I've seen cases where people built straw-clay walls in the late fall and the walls didn't dry until the following summer. This situation can lead to severe mold growth and/or decomposition of the straw-clay. The usual recommendation is to build straw-clay only when you can expect a week of dry weather for every inch of wall thickness. For example, an 8" thick wall would take 8 weeks of warm, dry weather to dry.
Q: I finished building my light straw clay slip wall on the north side of my house about 3 months ago. The only concern I have is that the wall has a slight musty smell to it. Is this normal? There are no signs of mold on either side of the wall. I assume the wall had long enough to dry since it is roughly 6 inches thick and was completed over 2 months before first freeze. We also had very dry weather during the wall's drying time. I haven't plastered it yet but moisture shouldn't be an issue as the roof overhangs about 10 feet past the wall.
A: If you can't see any mold, there is likely no problem. Mold needs air to grow so it always starts on the wall surface where you can see it. Perhaps a small bit of mold started growing as the wall dried but didn't get established enough to be visible. Just in case, I would recommend adding borax or boric acid to your base coat of plaster to make sure that any mold that may be there can't propagate out to the new surface. And make sure you do your plastering during warm, dry weather. If you plaster during wet weather, the drying time will be very slow and you can easily get mold established in your wall again.
Q: I have access to bentonite drilling mud, can that be used in a slip wall.
A: Bentonite is the most expansive of all clays, so it is generally not preferred for any kind of earthen building. However, if you're referring to a "slipstraw" or "light clay" wall, the percentage of clay in the wall is low enough that bentonite's tendency to shrink and crack as it dries may not matter. I'd encourage you to make a small sample wall and see how it preforms. You could also buy some powdered mortar clay at Home Depot or your local equivalent, and make a sample using that material for the sake of comparison. Mortar clay is typically selected for its low expansiveness, along with other characteristics that make it stable as a building material.
Q: I have land which is rich in clay, and straw/clay slip panels would suit my purposes, but straw is not easily available where I am. I can, however, source bales of shredded paper. Is there anyone who has used that instead of straw with clay to make panels. I have made experimental blocks with shredded paper and plaster of Paris, but would rather use a binder that is plentiful and free.
A: You can use clay to stick together almost anything, including paper. The resulting material will not be as insulative as straw-clay, because straws are hollow and contain a fair amount of trapped air, but if paper is all you can get it is certainly worth considering. Where are you located and what sort of structure are you trying to build? If you want to build a home in a place with cold winters, I would look for a more insulative wall system than you will be able to achieve with paper and clay. Maybe you could make a cavity wall and fill the cavity with shredded paper, treated with boric acid as a mold and insect deterrent?
Q: I have a question concerning a light straw clay construction in a hot and humid area (Mexico). So, we decided to use this technique because we have a lot of straw and we need a lighter technique to fill the wooden structure. The earth we have is not rich in clay and the straw has been seated in the field for a while. We will start this construction in the winter time, dry season. So, my questions are: what do you think about stabilizing the clay slip with lime to achieve better cohesion (maybe 10%)? We are thinking in using borax in the mix to avoid fungus problems in the future and during the drying process, also because I am afraid the straw might have fungus spores for being sited there for a while. How much borax should I add? I never found this info on the internet… I am also concerned on condensation inside the building. The summer is really hot and people tend to use strong air conditioner. Would I have problems in this seasons? I was thinking a lime interior coating would help but it doesn’t t avoid extra humidity to enter the walls. Why does everyone talk about borax and not boric acid? I am reading information on internet and seams like the one we should use is the boric acid. I am confused...
A: It’s reasonable to be concerned about mold growth when using straw-clay in a humid area. I’ve seen it happen myself and have heard even worse horror stories. I have had good success adding borax or boric acid to the slip, but I still only install straw-clay during dry weather. If you don’t have several weeks of reliably dry weather, it might not work well for you. Personally I would never use straw that has been sitting in the field and has gotten wet. The likelihood of mold problems is just too high. If you break open a bale and see darkened, discolored areas or can smell mold then the decomposition process has already begun.
Boric acid and borax can be used interchangeably. I use about 1/8 to 1/4 cup per bucket of clay slip. You might also try your idea of adding lime to your clay slip. I have not done this, but I know that lime is strongly anti fungal. I don’t know about combining lime AND boric acid - not sure the chemistry is compatible. Potentially you could substitute lime for all of the clay to make a much more mold-resistant wall. I have not tried this. What I have tried lately was a wall filled with lime and rice hulls. That worked well, and there is virtually no danger of mold growth even in humid conditions.
Once the wall is dry without molding, then there is much less danger of mold growth in the future. Still, an interior and/or exterior coat of lime plaster seems like a good precaution. Some minor humidity getting into the walls after they are dry shouldn’t be a problem since fungus also needs oxygen to grow and there will not be enough air getting through the plaster.
Q: I am looking to finish out a new construction basement by natural means. I had hoped to use light clay to insulate the walls, which are a combination of blue board and concrete studs, wrapped in Metal. Being such a specific application, is there anything I should look out for/hope to avoid?
A: You have to be very careful with light straw-clay to avoid mold growth, both during the initial drying phase and later on. Usually it is recommended that light clay infill be able to dry towards both sides of the wall, which might not be possible if you are building against an existing wall. Also, ventilation in a basement is generally minimal, which could lead to mold growth. And finally, if any of the walls you are building against are below grade on the outside, you could have moisture travel through the wall into the light clay. Altogether these are not promising conditions for light straw-clay to perform well over a long period of time. I would only recommend that you use light clay in your basement if you are in a very dry climate with a long warm spell for initial application and drying, if you have good ventilation in your basement, If the existing walls are very well drained and well sealed, and if the light clay is kept rather thin. Also I would add borax or boric acid to the clay slip as a mold-retarder and keep the amount of moisture in the mixture to a minimum. You could even pre-dry the straw and clay slip and then pack it into a wall cavity contained by permanent lath such as wooden lath, bamboo, or reed mat. Another possibility would be to substitute a mixture of rice hulls and lime for the straw and clay. This is an extremely mold-resistant combination that would likely outperform a straw-clay mixture if you have a local source of rice hulls.
Q: I want so badly to copy Gary Zuker’s SLC home, old world style, in Austin Tx with open ceiling scissor beams. I have zero construction experience and a very light budget. I do have tons of heart, grit, determination and creativity plus a burning desire like no other. I want to purchase some land first and am looking outside Reno Nevada or Oregon. I’d like to do as much of the work myself as possible. Please help me fill in some details. What kind of framing do I use? What kind of foundation did he use? Do you happen to know the measurements of his home? Lastly how do I find information in doing the plumbing electrical stonework and do I use the slc in the roofing for insulation?
A: Gary was one of the first straw-clay houses built in the US. It is certainly beautiful, but our understanding of straw-clay and of natural building in general have advanced a lot in the 25 years or more since he built it. Also, the climate is very different between Austin and the areas where you hope to build. So although you can certainly use Gary’s house as a design inspiration, I would caution you not to copy either his design or his building techniques exactly. You will have to read a few books, and ideally take some workshops from skilled and experienced builders, if you are starting from little or no experience. The first book I would recommend for you is “Essential Light Straw Clay Construction” by Lydia Doleman. This is by the far the best English-Language guidebook on the building technique, and you will learn a lot about wall framing as well as how to plan for, mix and install the straw-clay. Another book I would recommend is “Building Green” by Snell and Callahan. This walks you step by step through the construction process of a small natural building with lots of great photos, which is very useful for people who haven’t built before. Roof construction and detailing is one of the most technically challenging parts of building a home. I’m not sure exactly where to refer you, especially for scissor trusses. You will very likely want help with the roof framing if this is your first major construction project. And no, I would not recommend using straw-clay for roof insulation - it is far too heavy.
Q: Would straw/clay insulation work with metal building walls? I know there can be an issue with moisture building up in strawbales if they cannot dissipate moisture. Is it the same with slipstraw if there is metal on one side? We want to build our home with metal but still have the benefits of straw and plaster walls.
A: If anything, it’s even more important that straw-clay be able to dry to both sides than it is for straw bale, because there is moisture in the mix and a higher likelihood of mold if that moisture can’t escape quickly. It may be possible to install some sort of vented airspace between the straw clay infill and the metal siding. I have never done this myself, but I’ve heard ideas on how to do so. I have been working lately with ‘ricecrete’, a combination of rice hulls and lime, that is extremely mold-resistant and also better insulation than straw-clay. If you live near where rice is grown and have access to rice hulls, this could be a good option. I would say, however, that ventilation in general is going to be a huge concern for any metal-sided building.
Q: I am looking at packing light-straw into walls that have bathrooms on one side. Any thoughts on putting green-board (water proof drywall) on one side and plastering the other side of light-straw interior walls?
A: I have almost no personal experience with that product. However, an internet search reveals that green-board is not really waterproof, just water-resistant. I cannot find a vapor permeability rating for it, which is the most important thing to know as far as how it will affect the durability of straw-clay.
My guess is that rather than the greenboard itself, it would be what you put on top of it that really restricts vapor permeability. For example, latex paint has very low permeability and can lead to moisture problems. However, if you are able to prevent liquid water from getting into the wall, and if water vapor is able to dry to the other side, and if you live in a good drying climate, I expect you would be fine. Make sure that the straw-clay is fully dry before you install the greenboard, if you decide to go that way.
Also you should know that straw clay and earthen plasters are unlikely to be damaged by water vapor alone as long as they can dry. I know people who have used clay plasters over regular drywall over straw-clay in bathrooms with no problems. Of course I would use something more water-resistant, such as tile or a sealed lime plaster, in the shower and around sinks and tubs.
Q: I am starting on building a light straw clay house and the only clay I can get locally is refractory clay. Will refractory clay bind the straw as well as regular clay? Would adding lime improve its stickness? I am planning on using rice straw as it is available locally.
A: I expect that refractory clay will work fine if that’s all you can source. As I understand it, refractory clay or “fire clay” is just a subset of natural clay that is known to be stable at high temperatures. If the material you can source has non-clay binders added to it, I would be very cautious. I do not recommend adding lime, as that could interfere with the material’s moisture-modulating properties after it is dry. Especially if you have limited experience, I would strongly recommend that you buy and read Lydia Doleman’s book, “Essential Light Straw Clay Construction.” She has excellent guides to materials estimation, among much other how-to information. I know many people who have made serious mistakes with straw-clay.
Q: My slip-straw home is well under way and I'm trying to work out a few finish details on the interior. 1) The shower has straw walls (2 exterior, one interior partition wall). I may end up using tadelakt in the shower, but if I do decide to tile, what layers have you seen work? Waterproof backer board right to the studs/straw? Or clay base plaster first then backer board? It's a tiny shower, the walls will definitely be sprayed during every shower. 2) Tile backsplash in the kitchen---Is there a good way to tile over clay base plaster or should I put a strip of something else (drywall etc.) where I want that tile to go and base plaster around it? I'm not as worried about waterproofness here as I am in the shower, just don't want tiles to fall off when I try to wipe/wash them.
A: Making a shower wall out of slipstraw makes me nervous because slipstraw is so vulnerable to damage from moisture. I have made a shower out of cob. For that project, I screwed expanded metal lath directly to the cob, covered that with thinset with acrylic waterproofing admixture, then tiled onto that surface, again with water-resistant thinset. The grout also had acrylic added, and then I used a grout sealant over that. The shower was built around 18 years ago and has had frequent usage and no problems. You could use this same system for the tile backslpash in the kitchen. First add a thick coat of clay base plaster (1” thick”), and then proceed as above. You could probably do the same in the shower, but the consequences of any tiny leaks are much more severe with slipstraw vs. cob. I think tadelakt would work in theory (again over a thick earthen or clay/lime/sand base coat, followed by a lime/sand brown coat), but I wouldn’t try it unless you have a lot of tadelakt experience. It’s a huge job to tadelakt a surface the size of a shower, and any seams or cracks could lead to failure. I’m not really sure what else to recommend, other than framing a new wall with a drained airspace inside of your slipstraw wall, and it sounds like you may not have room for that. I hope you come up with something that will work.
Q: Do you perhaps have the quantities of wood chips & soil per cubic meter of wall?
In comparison to light clay straw, will light clay wood chips use more wood chips or less?
A: It’s actually much easier to calculate the volume of wood chips for a slip-and-chip wall than it is to calculate straw for LSC. For wood chips, you just need the same volume of chips as your volume of wall, so 1 cubic meter of chips for 1 cubic meter of wall. Clay soil is a bit more tricky since the amount you will need will depend on the purity of the clay source. I generally use 40% as much clay slip as chips by volume. Clay soil expands a bit when it is turned into slip, but not by as much as you would expect. So I would plan to have soil on hand equal to about a third of the volume of the wall. But you should definitely do some tests and determine your final recipe before being too confident with that number.